Add the chat widget to your website
Create a website channel, paste its code on every page and check that visitors can chat with your team from the Inbox.
Updated on
On this page
The chat widget is the chat bubble in the corner of your website. Visitors click it to write to you, and their messages land in the Inbox next to Zalo, Facebook and every other channel. Setting it up takes three steps: add your website in Ha Tang, copy its code, and paste the code on your site.
Before you start
- The Support module is turned on for the business. While it is off, the widget does not show anywhere.
- You have the Manage access level for Customer Support (owners and admins always have it). See Team and roles.
- You know your website's address, for example
mochuongtea.vn. - You, or whoever looks after your website, can add code to it or install a plugin.
Step 1: add your website
-
Go to Customer Support → Channels and click Add channel.
-
Under Websites & apps, pick Website.
-
Fill in the form:
Field What to enter Site name A name your team will recognise, for example "Mộc Hương Tea". It is also the title at the top of the widget; you can change it later. Domain The address of your website without https://, for examplemochuongtea.vn. The widget works on this address and on all its subdomains, such aswww.mochuongtea.vnorshop.mochuongtea.vn.Extra allowed origins Optional. Other addresses where the widget must load, one per line, for example a test site https://staging.mochuongtea.vn. Most shops leave it empty. -
Click Create site.
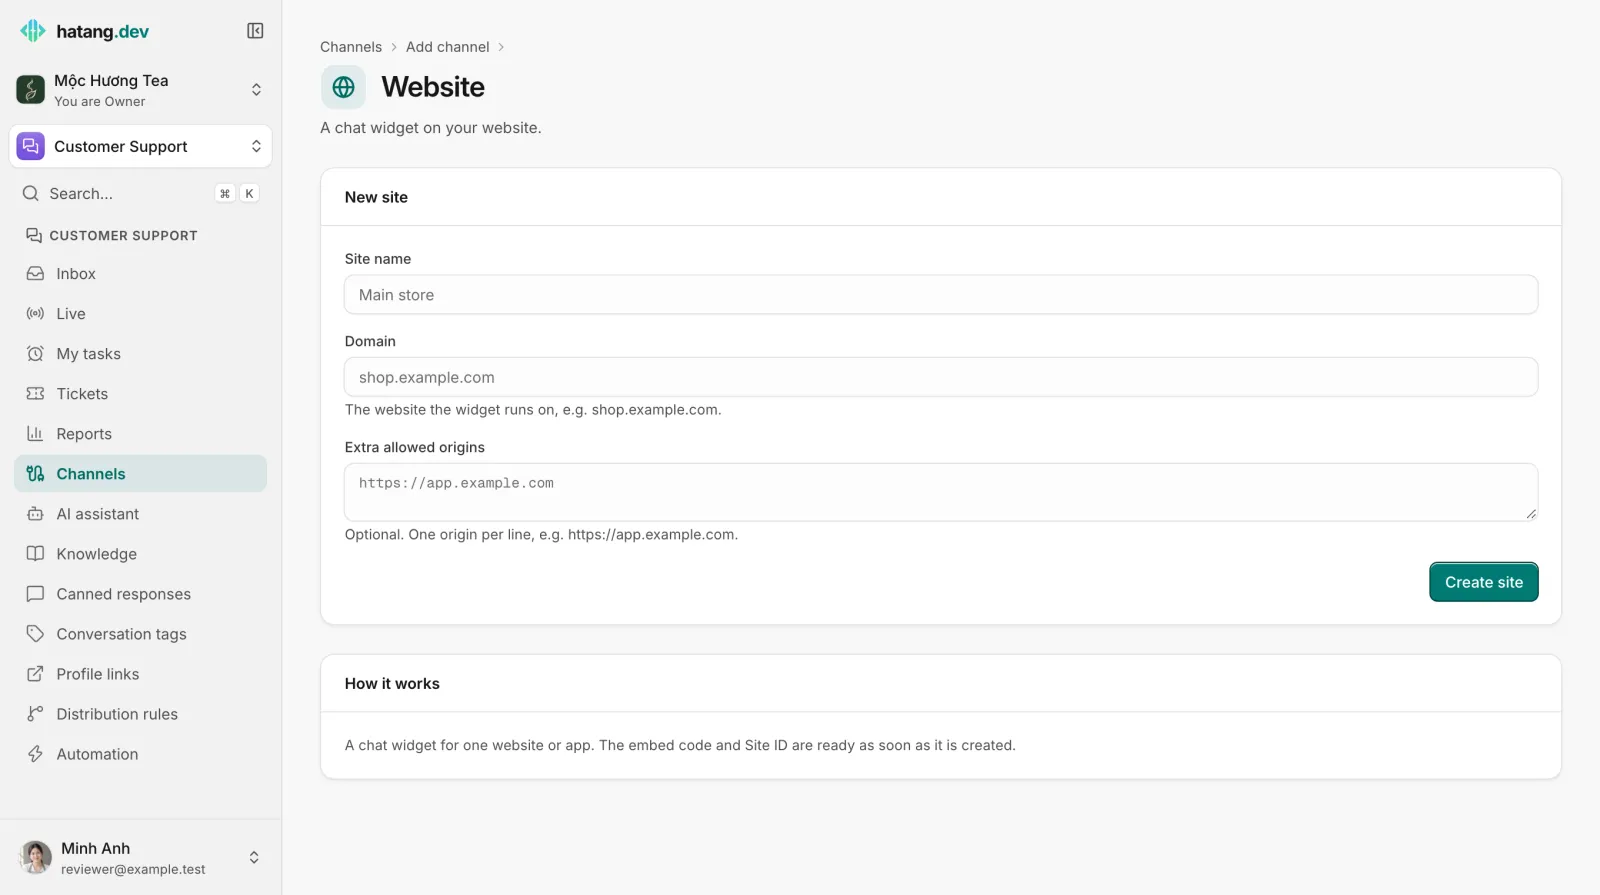
The website's page opens with its code ready. You find it again later under Customer Support → Channels, in the Websites & apps group.
Step 2: copy the code
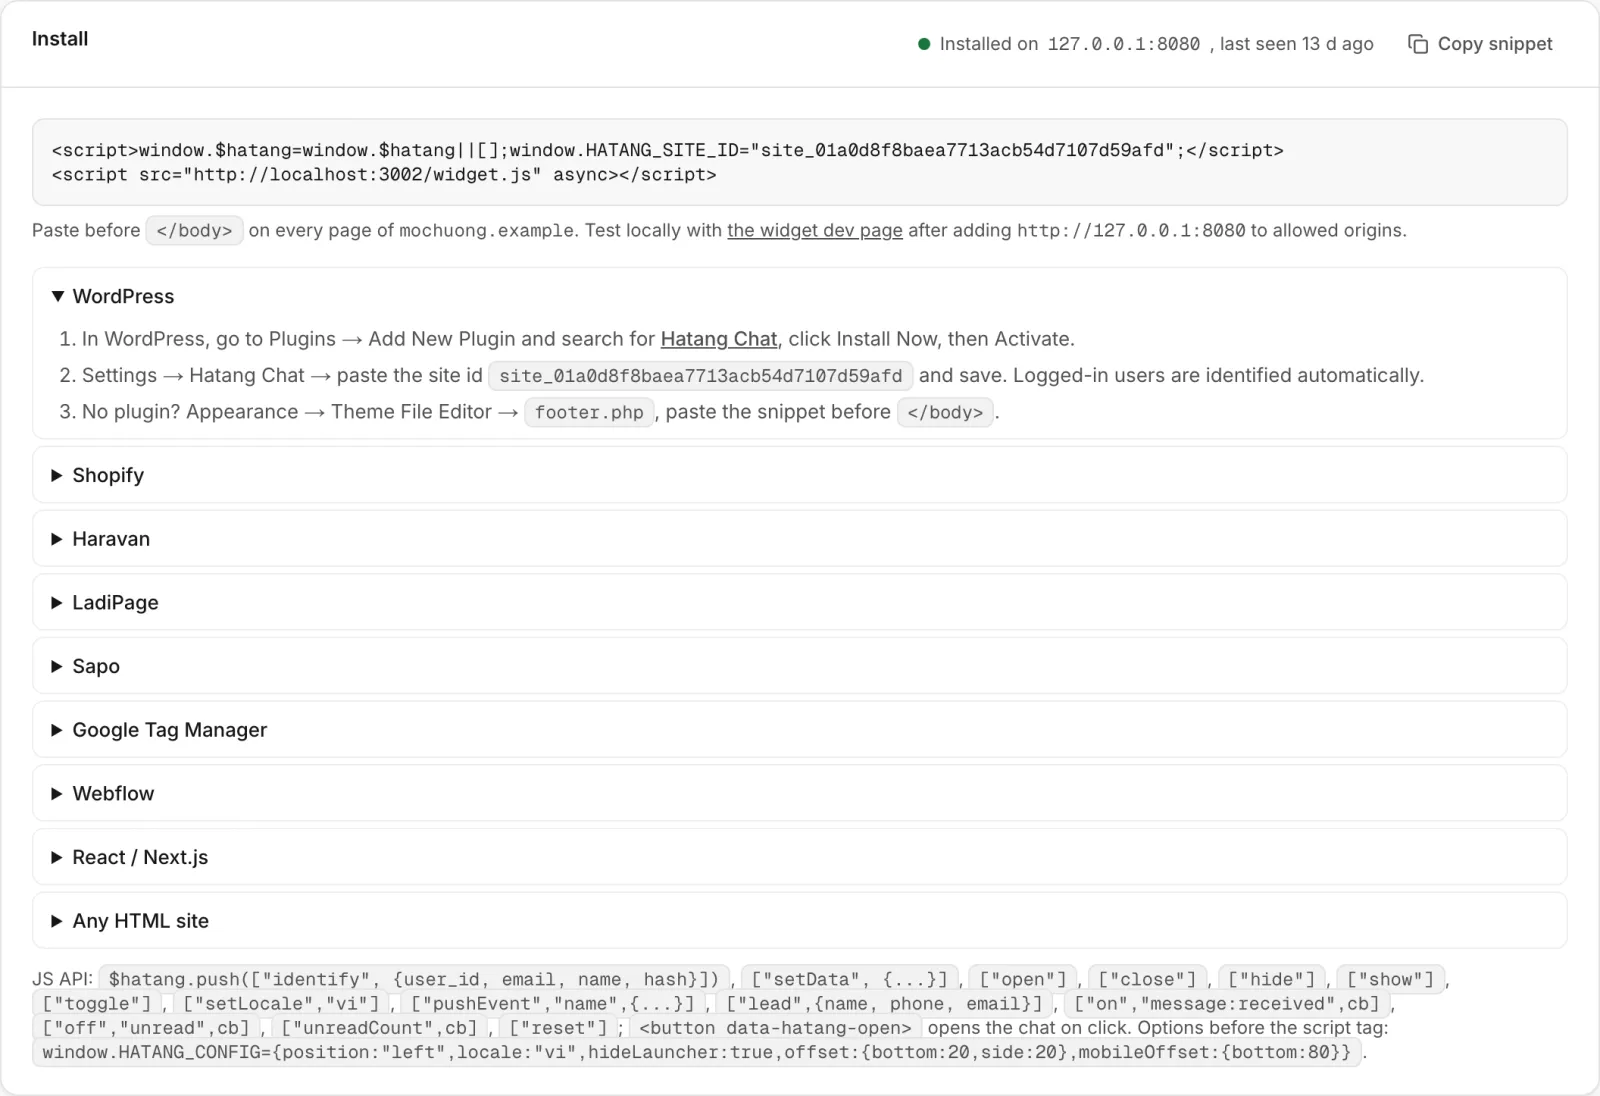
On the website's page, the Install card at the top shows a short piece of code with your website's ID already in it. Click Copy snippet.
Step 3: paste the code on your website
The code goes just before </body> on every page where visitors should be able to chat. Under the code, the Install card has step-by-step instructions for the most common platforms; click a platform's name to open them.
| Your website runs on | What to do |
|---|---|
| WordPress | Use the Ha Tang Chat plugin: you paste only the Site ID, no code. See Install the widget on WordPress. |
| Shopify | Online Store → Themes → Edit code, open layout/theme.liquid, paste the code just before </body> and save. |
| Haravan | Website → Giao diện → Chỉnh sửa mã nguồn, open layout/theme.liquid, paste the code before </body> and save. |
| LadiPage | Open the landing page, then Thiết lập → Mã JavaScript/CSS in the toolbar. Paste the code, save and publish again. Repeat on every landing page. |
| Sapo | Website → Giao diện → Thao tác → Chỉnh sửa HTML/CSS, open Theme.bwt, paste the code just before </body> and save. |
| Google Tag Manager | Tags → New → Custom HTML, paste the code, choose the All Pages trigger, save and publish the container. |
| Webflow | Project settings → Custom code → Footer code, paste the code and publish. |
| Built by a developer | Send them the code and the developer guide. React and Next.js sites can use the ready-made component. |
Step 4: check that it works
- Open your website in a browser. The chat bubble appears in the bottom-right corner.
- Back on the website's page in Ha Tang, the Install card now shows Installed on your domain and when the widget was last seen. Until the widget has loaded on your site once, it shows Not detected yet. The status refreshes at most once a minute.
- Send a test message from the widget. It appears in Customer Support → Inbox as a new conversation.
On the Channels page, the website's status changes from Not installed to Active.
Step 5: recognise logged-in users (if your site has sign-in)
If customers sign in to your website, let the site tell the widget who they are. Your team then sees the name, email and a Verified label in the Inbox, customers keep one chat history across devices, and profile links open the right customer in your admin. Without this step every customer is an Unverified stranger.
It takes a developer, on your server, with the website's identity secret. How to get the secret, what the developer does and how to check it are in Recognise logged-in users.
More than one website
Add one website channel per domain or brand: Customer Support → Channels → Add channel → Website again. Each website has its own code, its own widget settings and its own identity secret. All conversations still land in the same Inbox, and the website they came from is shown on each one.
Channels such as Zalo OA or a Facebook Page are attached to a website too: their conversations use that website's reports, distribution rules and automation. See How channels work.
Remove or pause the widget
- To hide the widget without losing anything, open the website's page and set Status to Disabled (widget hidden), then click Save settings.
- Delete site, at the bottom of the page, permanently deletes the website with its conversations, visitors, connected social channels and app keys. Type the site's name to confirm. This cannot be undone.
Useful next steps
Was this article helpful?
Related articles
- Install the widget on WordPressAdd the chat widget to a WordPress site with the free Ha Tang Chat plugin, without touching code, and recognise logged-in users.
- Change how the widget looksSet the widget's colour, theme, position, launcher button, header, language and the pages it shows on, and check every change in the live preview.
- The widget does not show on my websiteGo through the usual reasons the chat bubble is missing, from a page excluded in the settings to a domain mismatch, and fix each one.
Not finding what you are looking for?
Our team answers in the chat, in English or Vietnamese.