Install the widget on WordPress
Add the chat widget to a WordPress site with the free Ha Tang Chat plugin, without touching code, and recognise logged-in users.
Updated on
On this page
The Ha Tang Chat plugin puts the chat widget on every page of your WordPress site. You paste one ID, and the plugin does the rest: no theme files to edit. It also tells your team the name and email of visitors who are logged in to WordPress.
Before you start
- You have added your website in Ha Tang (Customer Support → Channels → Add channel → Website). See Add the chat widget to your website.
- You can sign in to WordPress as an administrator.
Find your Site ID
- In Ha Tang, go to Customer Support → Channels and click your website.
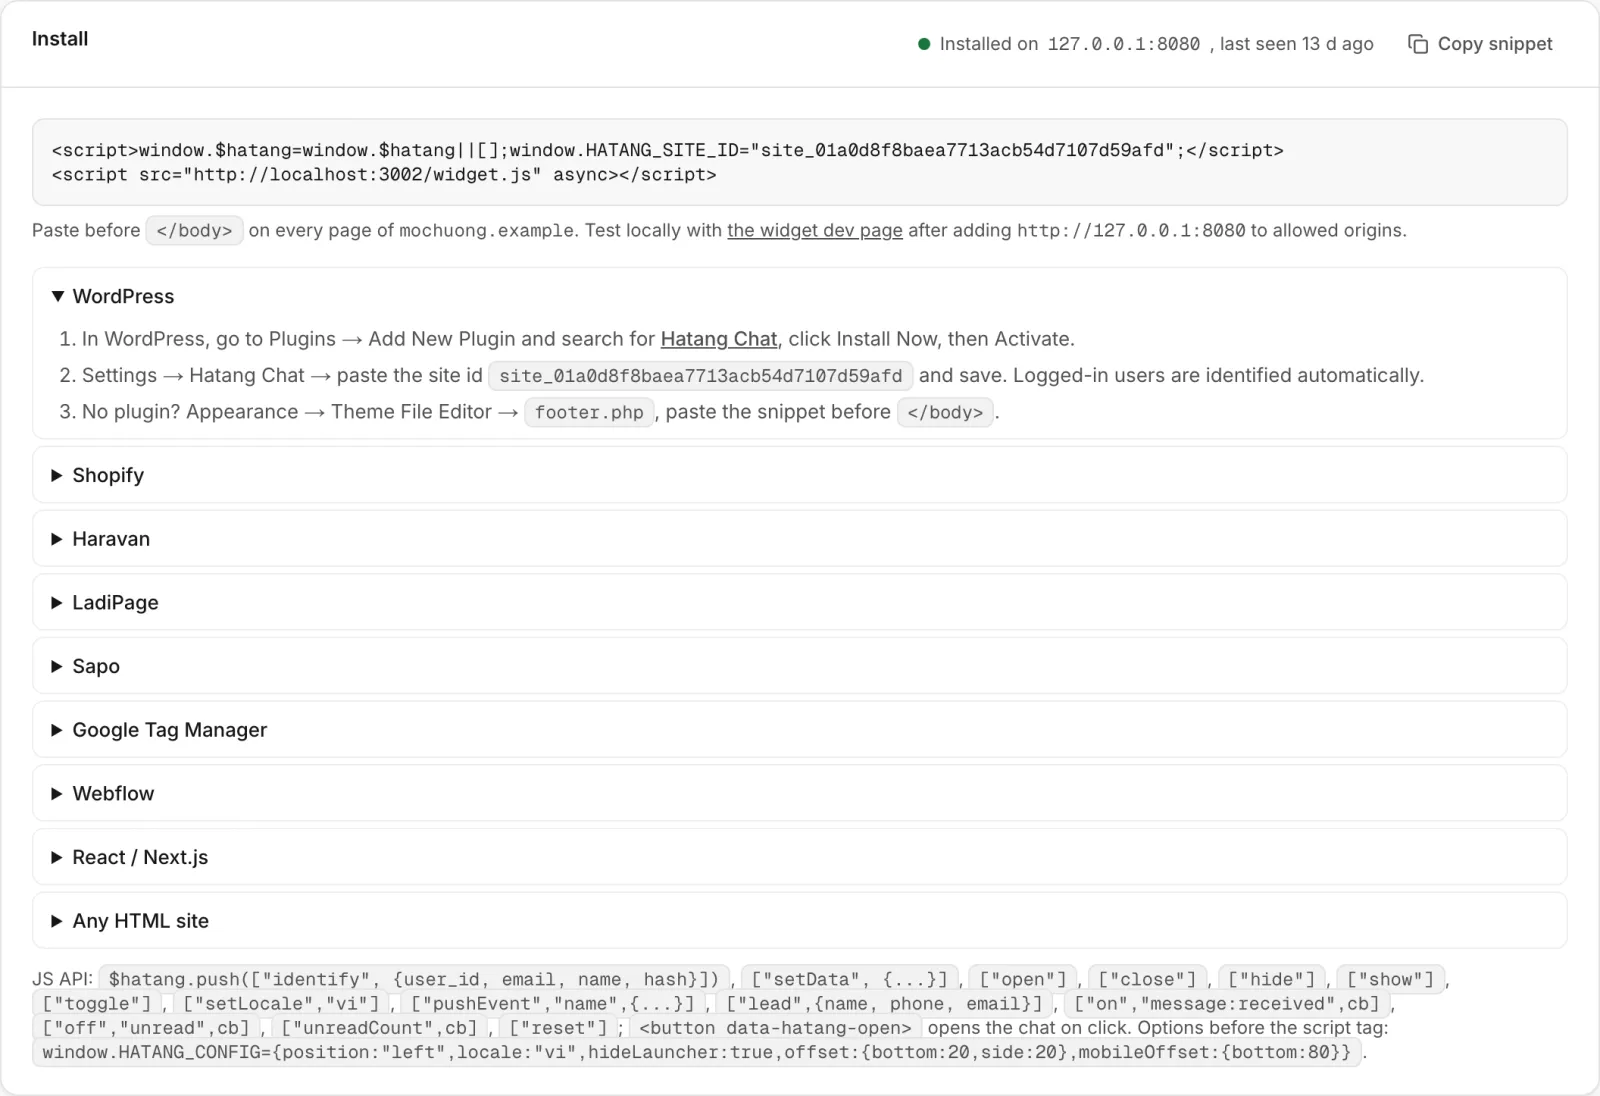
- In the Install card, open WordPress. The second step shows your site ID, which starts with
site_. Copy it.
Install the plugin
- In WordPress, go to Plugins → Add New Plugin and search for "Ha Tang Chat".
- Click Install Now, then Activate.
- Go to Settings → Ha Tang Chat.
- Paste the ID into Site ID and click Save Changes.
- Open any page of your site. The chat bubble appears.
Back in Ha Tang, the Install card of your website now shows Installed on your domain. Send a test message from the bubble: it arrives in Customer Support → Inbox.
The widget appears only on the public pages of your site, never in the WordPress admin. If Site ID is empty, the plugin loads nothing.
Plugin settings
Everything is on Settings → Ha Tang Chat.
| Setting | What it does |
|---|---|
| Site ID | Connects the plugin to your website in Ha Tang. |
| Widget host | Where the widget is loaded from. Leave the default https://chat.hatang.dev. |
| Position | Bottom right or Bottom left. |
| Language | Follow the WordPress language (per page) (default), Visitor's browser language, Tiếng Việt or English. |
| Logged-in users | Send the user's name and email to the inbox (on by default). |
Follow the WordPress language works page by page with Polylang and WPML: a Vietnamese page gets a Vietnamese widget, any other language gets English. Visitor's browser language lets the widget decide from the visitor's browser or from the Default language in Ha Tang.
Colours, greeting, office hours, the contact details form and everything else come from the website's settings in Ha Tang, not from the plugin. See Change how the widget looks.
Logged-in users
With Logged-in users on, when someone logged in to your WordPress site opens the chat, your team sees their WordPress display name and email in the Inbox. They do not have to type them.
In the Inbox these details are marked Unverified, because they come from the visitor's browser. To have them marked Verified and to keep the same chat history on every device the person uses, your developer adds a small piece of code that signs the user. See Recognise logged-in users.
Without the plugin
If you cannot install plugins, paste the widget code in your theme instead: Appearance → Theme File Editor, open footer.php and paste the code from the Install card just before </body>. Theme updates can overwrite this file, so the plugin is the safer choice.
Uninstall
Deactivate and delete the plugin under Plugins. The chat bubble disappears from your site at once. Your conversations stay in Ha Tang.
Useful next steps
Was this article helpful?
Related articles
- Add the chat widget to your websiteCreate a website channel, paste its code on every page and check that visitors can chat with your team from the Inbox.
- Recognise logged-in usersLet your website tell the widget who a signed-in customer is, so your team sees their name and history and the inbox marks them as verified.
- Ha Tang Chat for WordPressAdd the Ha Tang chat widget to every page of a WordPress site with the free Ha Tang Chat plugin, choose its position and language, and recognize logged-in users.
Not finding what you are looking for?
Our team answers in the chat, in English or Vietnamese.